
(Note: For this article I am using Microsoft Word with the Office 365 subscription on Windows 11.)
Microsoft Word is the most well-known and widely used word-processing software on the market. However, it is notorious for its apparent behavioral problems, such as unintended save locations, formatting changes, or text jumping. Many writers have turned to Scrivener as a solution only to experience a different set of frustrations. In this second part of a two-part series, we will see if Microsoft Word can match some of Scrivener’s best features.
Before reading further:
· Please read Part One of this series
· The goal of this article is to find features in Word that behave like the most popular ones in Scrivener.
· I am assuming the reader has working experience with Word.
· All solutions are default Word features that require no third-party apps.
Finally, some of the features I mention may require detailed explanations outside of the scope of this article. Let me know in the comments if you would like a more in-depth article about any of Word's or Scrivener’s features.
Microsoft Word overview:
Snap Assist
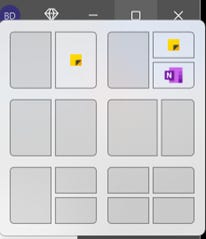
Snap Assist is a window docking feature in Windows 11. It allows you to open multiple programs at once and view them simultaneously. Hovering your mouse over the Maximize/Restore button will bring up several docking configuration options.
You can use Snap Assist with Scrivener, too, but there isn’t much need since Scrivener houses all its features internally. Word, on the other hand, was designed to operate with other Office programs to create a software ecosystem.
The Ribbon
The Ribbon is located at the top of the window and is made up of Tabs and Groups, as shown in the image below. I will reference the Ribbon throughout the article.
Styles and Headings
Styles are a group in the Home tab. At first, they may look like a quick way to change fonts, but each style has special document-formatting properties too. For this article, we are concerned with the heading styles. I use the Heading style for all chapter titles. For scene titles, I use Heading 2.
Macros
Think of macros as automated tasks or operations. You could make a macro to save your file every fifteen seconds or you could make one to open a window when you mouse-hover over a certain word. You can make macros to do virtually anything you can think of, including replicating many Scrivener features. However, creating them is an advanced task for the average user. While we won’t get into using or creating macros, I will occasionally point out when they may be used.
Fields
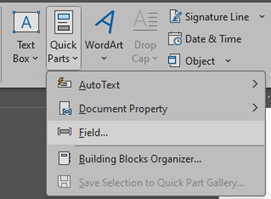
Fields let you display metadata as text within your document. For example, documents in standard manuscript format require the author’s name and word count to be in the headers. You can insert the ”Author” and “NumWords” fields into the header and it will appear as text that updates as your document changes. (Insert tab → Text group → Quick Parts dropdown menu → Field)
Analogs to Scrivener’s main parts
The Navigation Pane: The closest thing Word has to Scrivener’s Binder is the Navigation Pane. It is a Table of Contents that stays open on the left side of the screen. To use it as you would the Binder, you must use the heading styles mentioned above.
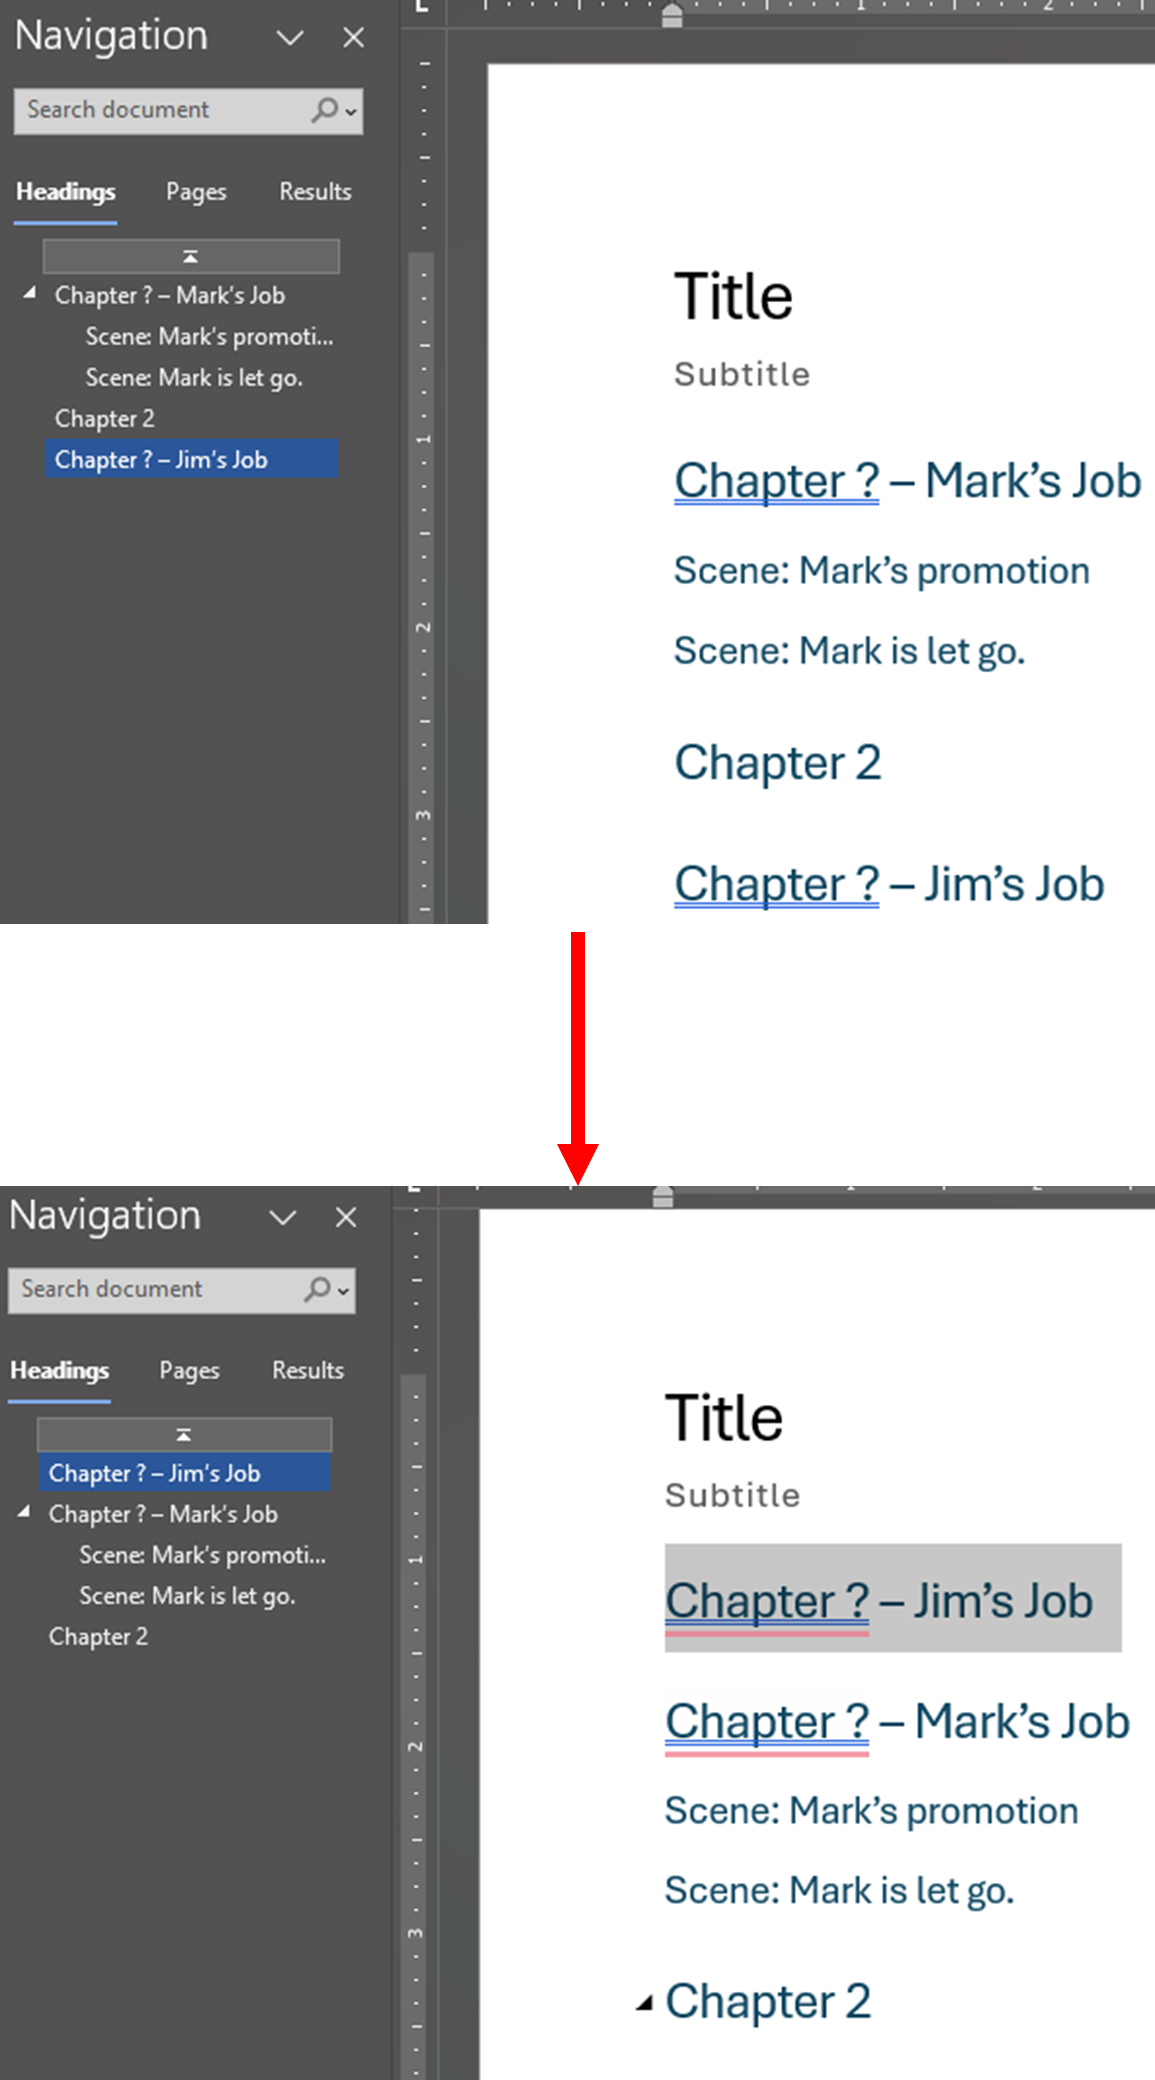
You can reorder items in the Navigation Pane with drag-and-drop, just like in Scrivener’s Binder (see the image below). You can also “promote” or “demote” headings in the Navigation Pane (i.e., switch from a Heading 2 style to a Heading style). This lets you turn a long scene into a chapter or vice versa.
To promote or demote a heading, right-click on it in the Navigation Pane and you will select from the first two options. Open the Navigation Pane by clicking on the View tab → Show group → check box next to Navigation Pane
Linked Notes: The Linked Notes feature in Word is relatively new and gives Word the same notetaking and research-storing functionality as Scrivener. It lets users link OneNote pages to Word documents.
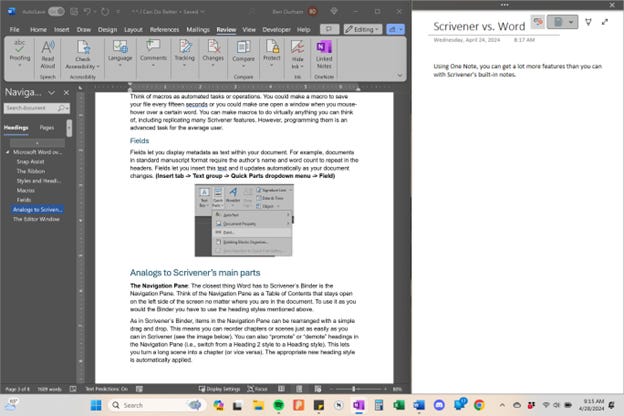
OneNote is a separate program from Word but it comes standard with the Office 365 subscription. You can link a OneNote page to your document and use it like a notepad as in the image below. You can also store research, website clippings, articles, or audiovisual segments and reference them as you write. (Review tab → One Note group)
Simulating the Editor: Remember, Scrivener’s Editor has three views: Document View, Outline View, and Corkboard View. As detailed below Word can easily do the first two. The Corkboard view, however, is unique to Scrivener.
Word’s Print Layout is what Scrivener would call “Document View.” It is the default view in Word and most users probably never use another. There are, however, several other options, including Outline View.
As long as you have been using headings properly, Outline View in Word functions much like it does in Scrivener. You can drag and drop chapters, scenes, or sections where you think they fit best. You can promote and demote headings just like you can in the Navigation Pane. (View Tab → Views Group → Outline button)
Can Word tackle Scrivener’s best-known features?
The Compiler
While there is no single feature in Word that works like the Compiler in Scrivener, there are ways to do almost the same things. First, however, it is worth noting that the Compiler is more than a Save As option. The Compiler formats and exports a file using the manuscript text and certain metadata (e.g., to place the author’s name on the title page, the word count in the upper right corner, etc.). This is especially useful when exporting a document into standard manuscript format.
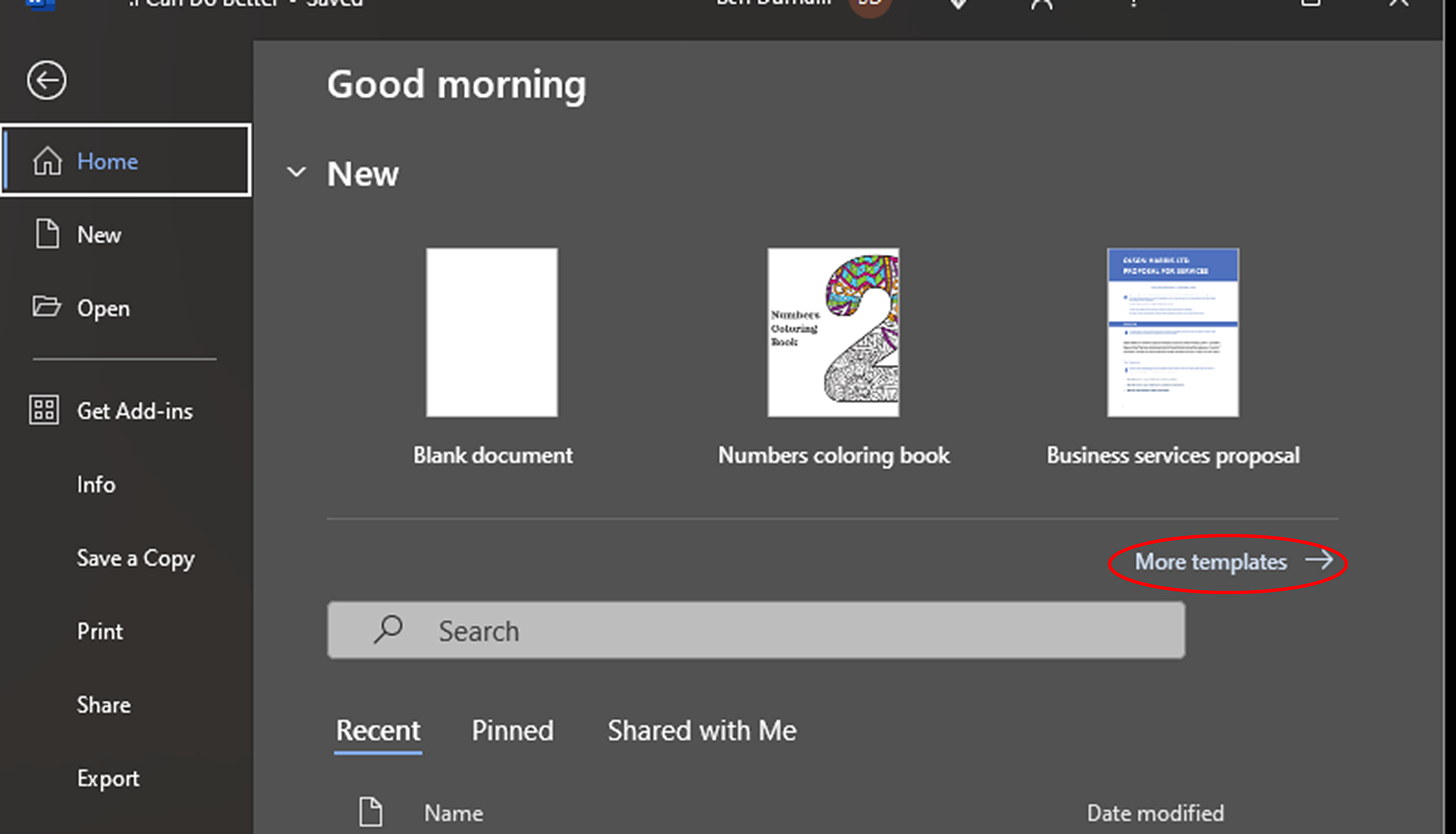
While Word does not compile or export a document into standard manuscript format it does have a manuscript template. To find the manuscript template, open Word and browse under More Templates instead of using the default “Blank document.”
Composition mode
Word has Focus, and it is almost as good as Scrivener’s Composition mode. It puts Word into full screen and blacks out everything other than the document itself. Word lets you go even deeper and do a line-by-line focus, further dimming all text except the current line. This is great for the line editing stages of your project. (View tab → Immersive group)
Word counts, targets, and progress trackers
Word does not offer goal setting or progress tracking beyond a basic word counter at the bottom of the screen. However, it is possible to recreate these features using Fields and Macros.
What about Scrivener’s underrated features?
Split view
In Scrivener, split view lets you see documents side-by-side or stacked. Word offers this and more. (For View tab → Window group)
Dialogue focus
I have not seen anything in Word that lets you fade out non-dialogue text. Considering how helpful this tool is for dialogue editing, it’s a big plus for Scrivener.
Speaking mode
Word has Read Aloud and it does everything Scrivener’s Speaking feature can do. There are plenty of options available to customize the pitch, tone, and cadence of the voice. (Review tab → Speech group)
Typewriter scrolling
I have not found this feature in Word. If you like this Scrivener feature, then give the team at Literature & Latte another point.
Project templates
Word and Scrivener use templates in different ways. Scrivener templates focus on organizing your entire project window so that it opens with the views and information you want. Word’s templates, on the other hand, affect just how the document looks and prints. That being said, you can save any Word document as a template by going to File → Save a Copy and choosing the Word Template (.dotx) format.
Conclusion
It would be inaccurate to say that Word can do everything Scrivener can, or to say that one program does something better than the other. They are different programs with different goals and somewhat different features. While Scrivener aims to keep all your project information together in one place, Word excels at document creation and Office product integration.
I am a technical writer, so I use Word and Framemaker on a daily basis. For fiction writing, I prefer Scrivener. They are different tools that work best for different jobs. However, for the average user, this may come down to money. Scrivener is a one-time sixty-dollar fee, whereas Microsoft Office 365 costs just a bit more and is a yearly subscription. Regardless of which you choose, if you are focusing too much on your tools and not on your writing, neither program will help you get that manuscript written.
We would love to hear your thoughts, questions, and opinions. Let us and other readers know where you stand on the Word vs. Scrivener debate in the comments below.




I have never used Scrivener, but have used Word for over 30 years, and am surprised at how clumsy it still is. I used to have a film-script program which was wonderful in all the ways it held notes and formatted, and wish Word was as efficient as even that old program was.